
Merge Screenshots for Documentation
Show the full workflow in a single image
When writing software tutorials, product documentation, or technical blog posts, screenshots are often the clearest way to explain each step.
But if every step is shown as a separate image, readers have to keep scrolling and jumping between screenshots. That breaks reading flow and slows down understanding, especially for tutorials with continuous actions.
By merging multiple screenshots into one long image (or a side-by-side comparison), you can present the full process in a more connected way and make each step easier to follow.
MergePictures.net provides a simple screenshot merging workflow that runs directly in your browser. No installation, no image upload to a server, and fast output for documentation.
Example
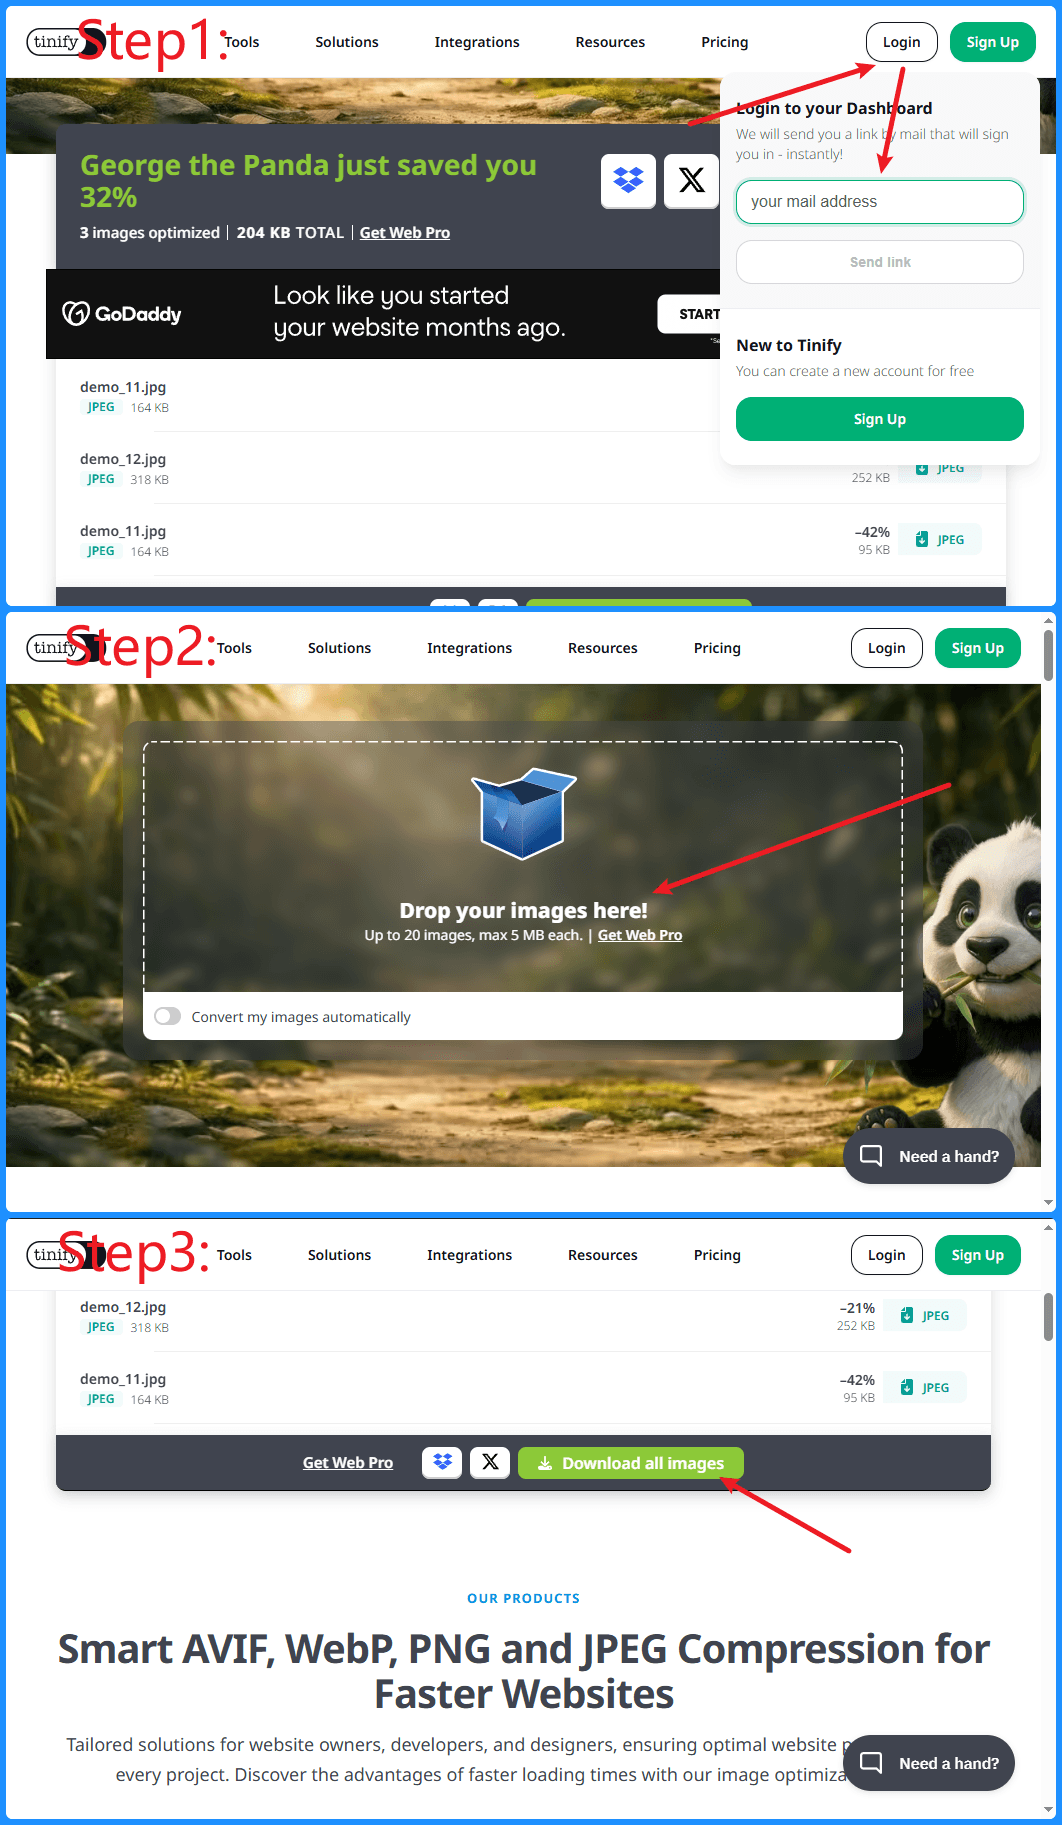
Figure 1: Merge multiple operation steps into one continuous screenshot
For example, in a tutorial with three steps, "Log in -> Upload -> Download," using three separate images forces readers to switch context repeatedly.
If those screenshots are stitched vertically, the complete flow appears at once and is much easier to read.
Why merge screenshots in documentation?
1. Present a complete step-by-step flow
Software guides often include consecutive actions such as:
- Log in to the system
- Open a menu
- Change settings
- Save configuration
- Check results
When each action uses a separate image, the article becomes long and fragmented.
A single merged screenshot helps readers understand the full flow faster.
2. Reduce page length
A tutorial may contain dozens of screenshots.
If each screenshot is separated by paragraphs, pages become extremely long.
Merging related steps into one image makes documentation more compact.
3. Improve reading efficiency
Readers can quickly see:
- What happened in the previous step
- What changed in the current screen
- Where to click next
For software docs and product guides, continuous screenshots are often easier to understand than isolated images.
4. Keep layout style consistent
You can keep all screenshots with:
- The same width
- Consistent spacing
- Unified background
- Aligned arrangement
This makes your documentation look cleaner and more professional.
Common use cases
Software tutorials
Examples:
- Photoshop tutorials
- Excel tutorials
- Word tutorials
- VS Code how-to guides
- ChatGPT usage tutorials
These tutorials include multi-step actions and are ideal for merged screenshots.
Developer documentation
Developers often need to show:
- API debugging steps
- Postman request results
- Database setup
- Docker deployment
- Git operation flow
- Cloudflare settings
- GitHub Actions configuration
Merging related screenshots helps teams understand setup workflows quickly.
Bug reports
When submitting a bug, teams often need:
- Error page
- Console logs
- Network requests
- Result after fix
Combining these screenshots into one image helps engineers locate issues faster.
Product help center articles
Product and operations teams often need to show:
- Feature entry point
- Action buttons
- Settings page
- Final result
A merged screenshot can display the entire user path in one visual.
Training materials
Internal training usually requires many image-based tutorials.
Combining multiple steps into one screenshot makes training documents easier to scan and understand.
How to merge screenshots with MergePictures.net
The process is straightforward.
Step 1: Upload screenshots
Choose the screenshots you want to combine.
Supported formats:
- PNG
- JPG
- WEBP
Step 2: Reorder screenshots
Arrange screenshots based on the real operation sequence.
Drag-and-drop sorting is supported.
Step 3: Choose a layout
Select one layout:
- Vertical merge (best for tutorials)
- Horizontal merge (best for comparisons)
- Grid layout (best for multiple interfaces)
Step 4: Adjust style
Customize:
- Image spacing
- Rounded corners
- Background color
- Outer margins
This helps you produce cleaner documentation visuals.
Step 5: Download the final image
Click download to export a high-quality PNG for:
- Markdown
- Word
- Help centers
- Technical blogs
- Wiki pages
Best practices
- Use screenshots with similar resolution for a cleaner merged result.
- Keep screenshot order consistent with the real user journey.
- Add background color and spacing so each step stays visually separated.
- If you have many screenshots, add labels like Step 1, Step 2, Step 3.
- Export as high-quality PNG to keep text, buttons, and UI details readable.
Conclusion
For software tutorials, developer docs, and help center content, screenshots are often the fastest way to explain operations.
By merging continuous screenshots into one image, you can shorten pages, make workflows more coherent, and improve reader comprehension.
If you are preparing a technical blog post, software guide, or product documentation, use MergePictures.net to stitch screenshots into a professional process image in minutes, with no installation and no server upload.